


Splunk Views: How to Embed Hyperlinks in a Custom App
By Nate Hufnagel, Splunk Consultant
Private apps, also known as custom apps, grant Splunk admins the ability to package custom configurations and specialized functions into a neatly organized bundle. Throughout the lifetime of a typical Splunk deployment, there may be a need to embed custom links to enrich the end user experience. This guide will walk you through how to build your own custom app and embed a hyperlink, all through the UI. Note: in practice, this will require working knowledge of XML. The code needed to get this example working has been provided.
Directory Tree
Before we dive into the code itself, let’s explore the bones of most apps within Splunk. Here is a diagram of the directories that Splunk expects within its applications:
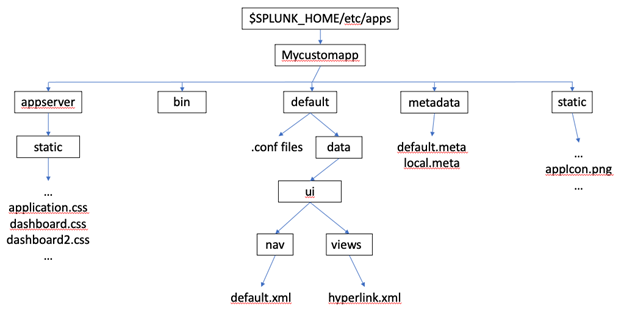
More in-depth info on what each directory contains can be found here: https://dev.splunk.com/enterprise/docs/developapps/createapps/appanatomy/
These subdirectories are created automatically when a custom app is created through Splunk Web. Select local configuration settings, navigation menus, views, and app permissions can be customized through the UI. The navigation menu and the views are the primary attributes we’ll be modifying in this case. The “default/data/ui” directory is where navigation menus and views are defined in the UI, and where hyperlinks can be embedded in the XML of custom apps.
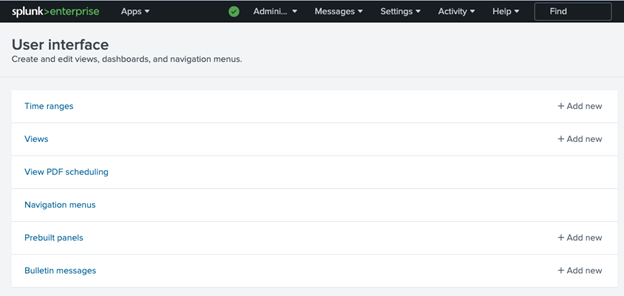
To find the code, navigate to Settings>User Interface. From here the XML can be edited directly. Views and Navigation menus can be filtered by app and owner.
CSS stylesheets and static images can be used to further customize a private app as it appears in Splunk. Navigate to Manage App>Edit Properties>Upload Asset to upload these types of files to a particular app.
Splunk Default Stylesheets
All necessary default stylesheets and files can be found using the barebones template. In this example, it’s easiest to take advantage of the default stylesheets built into Splunk. While there are a few to choose from, this custom app references the default stylesheet “dashboard.css”.
Creating the App and Custom Views via Web UI
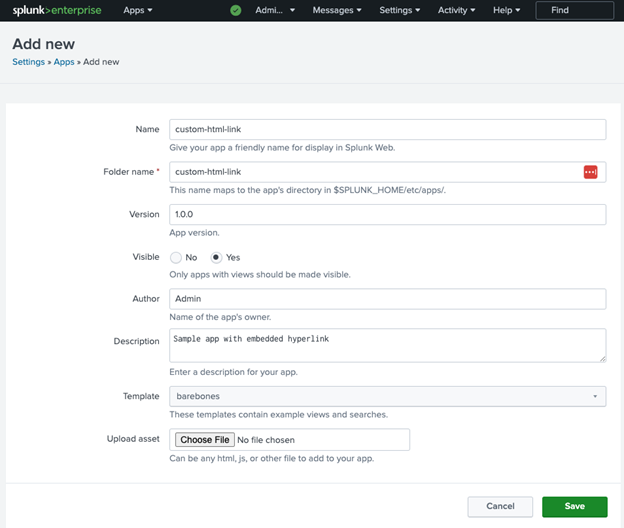
To create a custom app, navigate to Apps>Manage apps>Create App. Fill out the fields as shown in the image below (the app name can be different). The barebones template will suffice for this example. The option to upload assets is also available upon app creation should you desire more customization. Once finished, click “Save”
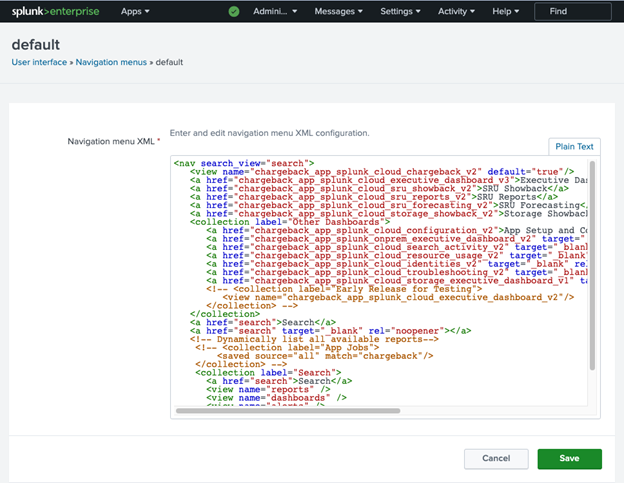
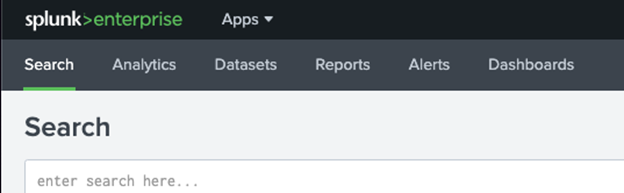
Now that the app is created, let’s look at the default code. Navigate to Settings>User Interface>Navigation menus. The Navigation menus are the “tabs” that appear in the light gray bar near the top of the UI, just below the main navigation bar. These menus can be customized in the UI to suite your apps’ particular needs. The default navigation menus match the ones found in the Search and Reporting app:
For this example, we’ll create our own custom navigation menus. From Settings>User Interface>Navigation menus, filter the results on the custom app name and “Created in the App”
In the Nav name column, clock into “default” and delete the default XML. Add the block of code below to create the custom navigation menus:
<nav search_view="search" color="#5CC05C">
  <view name="search" default="true" />
  <view name="hyperlink" default="false" />
</nav>
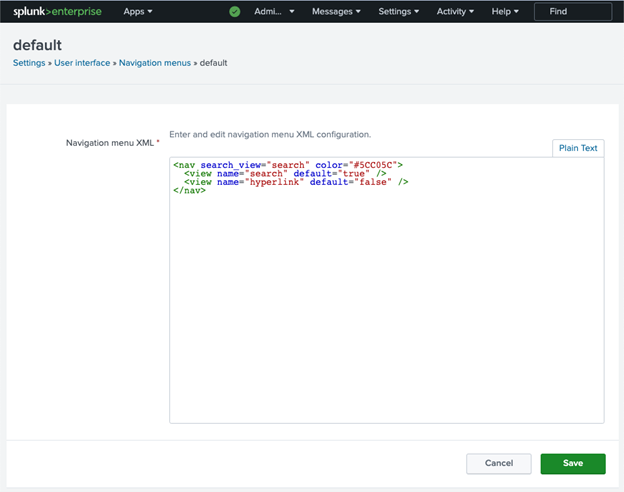
Once finished, click “Save”
Next we’ll create a custom view in the new navigation menu we just created. Navigate to Settings>User Interface>Views. Select the custom app from the drop-down menu and specify “Created in the App”. There should be no configurations present. Click “New View”, enter a name, and copy the body of XML below into the “View” block:
<dashboard version="1.1" stylesheet="dashboard.css">
  <label>Hyperlink</label>
  <row>
    <panel>
      <html>
        <section>
          <p>Click the hyperlink to have fun with regex: <a href="https://regex101.com/" target="_blank">More regex, please!</a></p>
        </section>
      </html>
    </panel>
  </row>
</dashboard>
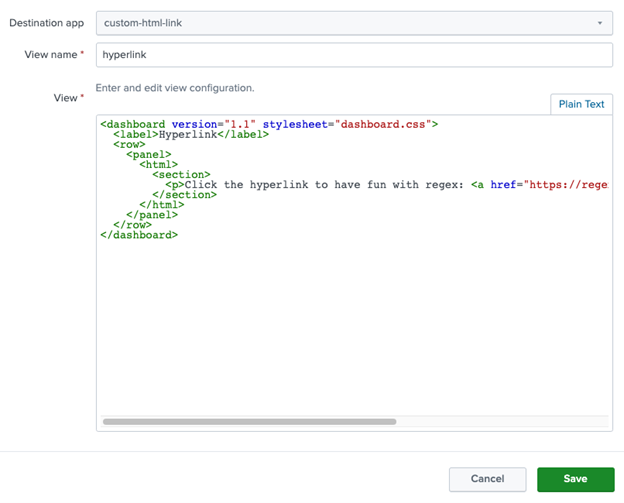
This is where we define the stylesheet for the webpage and embed the hyperlink. You can embed any link you like using standard XML syntax within the <section> element. Note: if your link directs users to external sites, be sure your firewall rules allow for this. In this example, we include a short message and a link to regex101.com.
That’s it! Navigate to the app from the App dropdown and observe the changes to the UI.
