

Connecting Splunk to Lightweight Directory Access Protocol (LDAP)
By: Pete Chen | Splunk Team Lead
Overview
Splunk installation is complete. Forwarders are sending data to the indexers, search heads successfully searching the indexers. The next major step is to add central authentication to Splunk. Simply put, you log into your computer, your email, and your corporate assets with a username and password. Add Splunk to the list of tools available to you with those credentials. This also saves the time and hassle of creating user profiles for everyone who needs access to Splunk. Before embarking on this step, it’s important to develop a strategy for permissions and rights. This should answer the question, “who has access to what information?”
LDAP Basics
LDAP stands for Lightweight Directory Access Protocol. The most popular LDAP used by businesses is Microsoft’s Active Directory. The first step in working with LDAP is to determine the “base DN”. This is the name of the domain. Let’s use the domain “splunkrocks.local” as an example. In LDAP terms, it can be expressed as dc=splunkrocks,dc=local. Inside of the DN are the organizational units, OU’s. So an example of an organizational unit expressed is ou=users,dc=splunkrocks,dc=local.
Most technical services require some sort of authentication to access the information they provide. The credentials (username and password) needed to access the LDAP server is called the “BindDN”. When a connection is requested, the AD server will require a user with enough permissions to allow user and group information to be shared. In most business environments, the group managing Splunk will not be the same group managing the LDAP server. It’s best to ask for an LDAP administrator to type in the credentials during the setup process. The LDAP password is masked while it’s being typed and is hashed in the configuration file.
Keep in mind that connecting Splunk to the LDAP server doesn’t complete the task. It’s necessary to map LDAP groups to Splunk roles afterward.
Terms
LDAP: Lightweight Directory Access Protocol
AD: Active Directory
DN: Distinguished Name
DC: Domain Component
CN: Common Name
OU: Organizational Unit
SN: Surname
Sample Directory Structure
Using our sample domain, Splunkrocks Local Domain (splunkrocks.local), let’s assume an organizational unit for Splunk is created called “splunk”. Inside this OU, there are two sub-organizational units, one for users, one for groups. In Splunk terms, these are users and roles.
| Group | Users | Users SN |
| User | Austin Carson | austin.carson |
| User | Kim Gordon | kim.gordon |
| User | James Lawrence | james.lawrence |
| User | Wendy Moore | wendy.moore |
| User | Brad Hect | brad.hect |
| User | Tom Chu | tom.chu |
| Power User | Bruce Lin | bruce.lin |
| Power User | Catherine Lowe | catherine.lowe |
| Power User | Jeff Marlow | jeff.marlow |
| Power User | Heather Bradford | heather.bradford |
| Power User | Ben Baker | ben.baker |
| Admin | Bill Chang | bill.chang |
| Admin | Charles Smith | charles.smith |
| Admin | Candice Owens | candice.owens |
| Admin | Jennifer Cohen | jennifer.cohen |
Connecting Splunk to LDAP
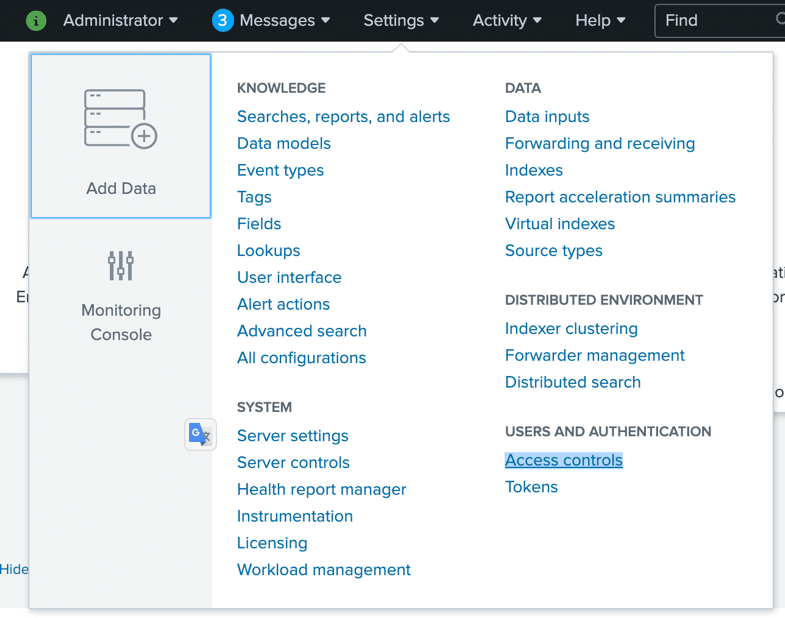
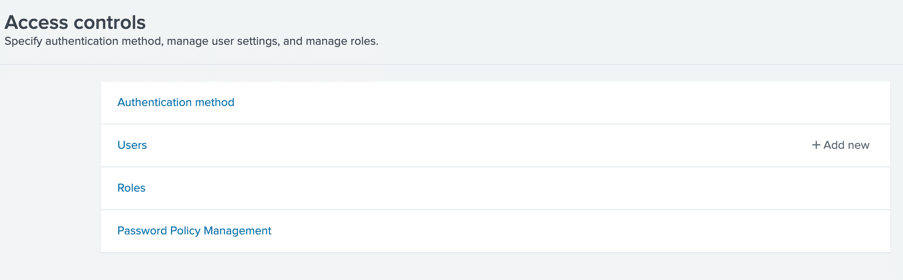
From the main menu, go to Settings, and select Access Control.
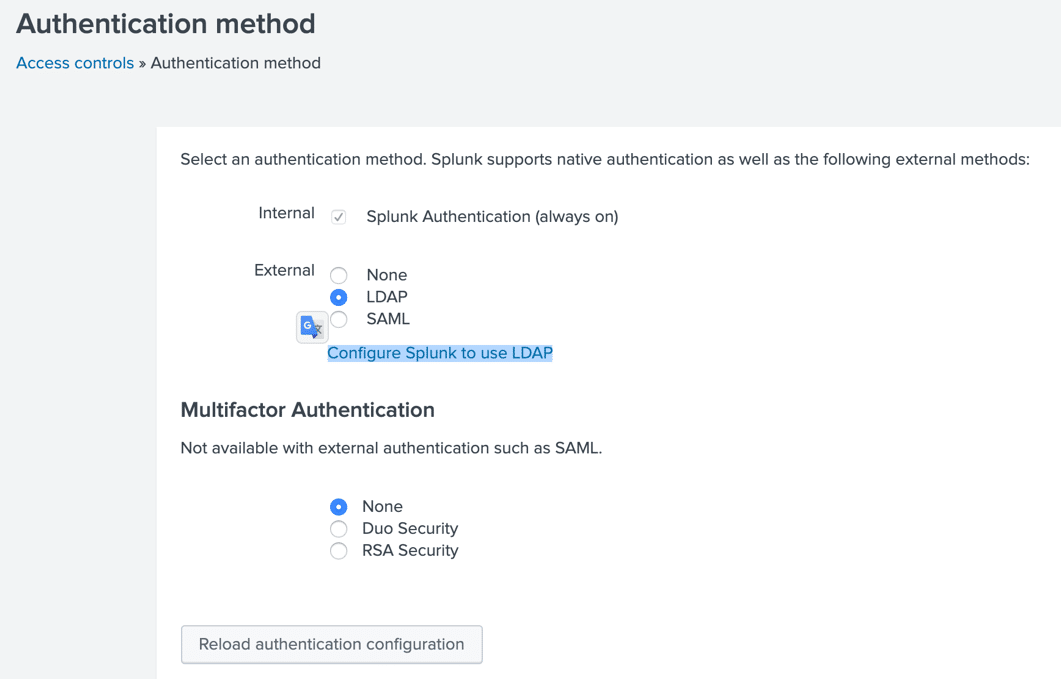
Select Authentication Method
Select LDAP under External Authentication. Then click on Configure Splunk to use LDAP
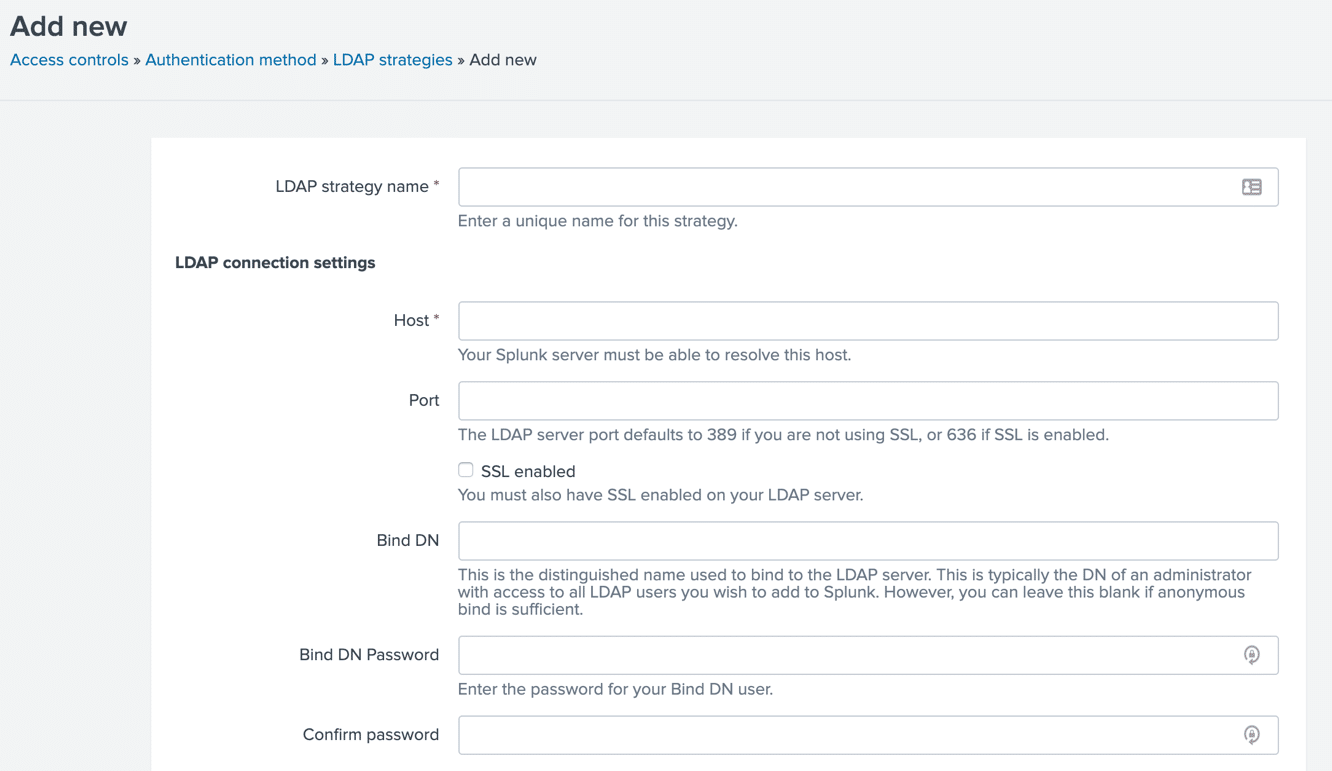
In the LDAP Strategies page, there should not be any entries listed. At the top right corner of the page, click on New LDAP to add the Splunkrocks AD server as an LDAP source. Give the new LDAP connection a name.
The first section to configure is the LDAP Connection Settings. This section defines the LDAP server, the connection port, whether the connection is secure, and a user with permission to bind the Splunk server to the LDAP server.
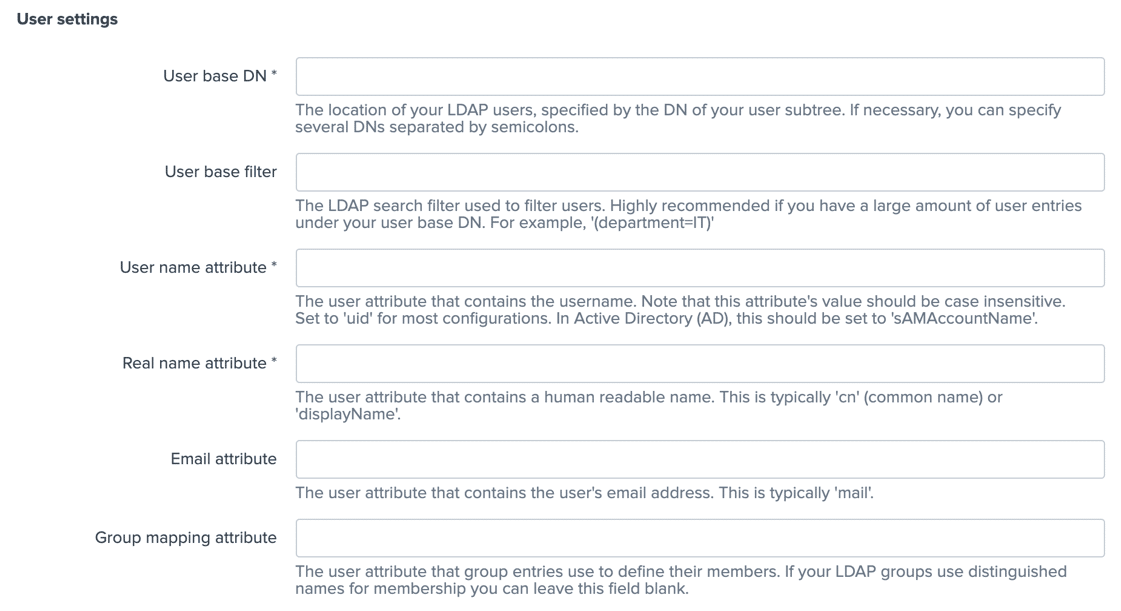
The second section determines how Splunk finds the users within the AD server.
– User base DN: Provide the path where Splunk can find the users in on the AD server.
– User base filter: This can help reduce the number of users brought back into Splunk.
– User name attribute: This is the attribute within the AD Server which contains the username. In most AD servers, this is “sAMAccountName”.
– Real name attribute: This is the human-readable name. This is where “Ben Baker” is displayed” instead of “ben.baker”. In most AD servers, this is the “cn”, or Common Name.
– Email attribute: this is the attribute in AD which contains the user’s email.
– Group mapping attribute: If the LDAP server uses a group identifier for the users, this will be needed. It’s not required if distinguished names are used in the LDAP groups.
The second section determines how Splunk finds the groups within the AD server.
– Group base DN: Provide the path where Splunk can find the groups in on the AD server.
– Static group search filter: search filter to retrieve static groups.
– Group name attribute: This is the attribute within the AD server which contains the group names. In most AD servers, this is simply “cn”, or Common Name.
– Static member attribute: The group attribute with the group’s members contained. This is usually “member”.

The rest can be left blank for now. Click Save to continue. If all the settings are entered properly, the connection will be successful. A restart of Splunk will be necessary to enable the newly configured authentication method. Remember, adding LDAP authentication is the first part of the process. To complete the setup, it’s also necessary to map Splunk roles to LDAP groups. Using the access and rights strategy mentioned above, create the necessary Splunk roles and LDAP groups. Then map the roles to the groups, and assign the necessary group or groups to each user. Developing this strategy and customizing roles is something we can help you do, based on your needs and best practices.
Want to learn more about connecting Splunk to LDAP? Contact us today!