


How to Get CrowdStrike Data Into Splunk: A Step-by-Step Guide
By Dave Cheever, Splunk Consultant
This blog will take you through the necessary steps to get CrowdStrike data into Splunk via API. Before starting, ensure the CrowdStrike App and Technical Add-On (TA) are installed in your Splunk environment. For Splunk Cloud, simply install both the App and TA using your Search Head. For on-prem instances, the CrowdStrike App should be installed on Search Heads and the TA should be installed on Indexers or Heavy Forwarders depending on where your data will be collected and parsed. Don’t forget to also create an index for your new CrowdStrike data.
Phase One: Generate an API key in CrowdStrike
Navigate to SUPPORT AND RESOURCES within the Falcon console to manage API clients and keys used by your organization. Select API CLIENTS AND KEYS to view, edit, or create an API:

Your account’s cloud base URL for API interactions is located on the top of this page. Select ADD NEW API CLIENT to generate a new API:

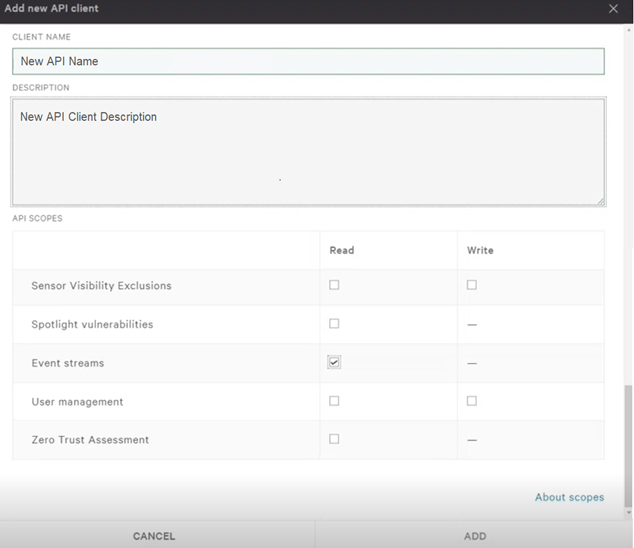
Provide an API client name, a description for this API, and select your API scopes. At a minimum, you’ll want to select EVENT STREAMS as seen below:
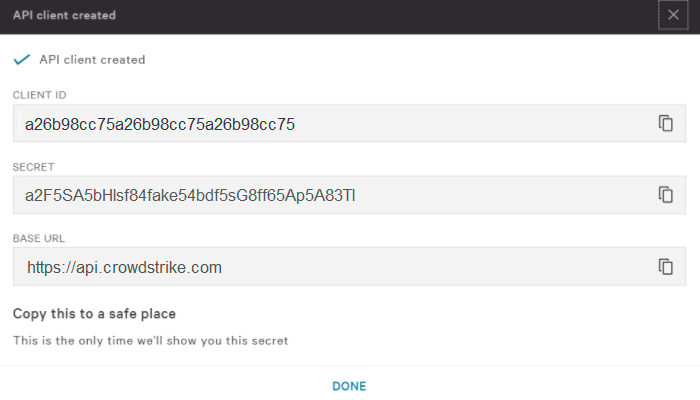
Record your API secret somewhere safe. Once this window is closed, the secret is no longer available. This information will be used when configuring the TA within Splunk:
Phase Two: Configure the CrowdStrike TA in Splunk
In the CrowdStrike Falcon Event Streams TA, select CONFIGURATION toward the top of the page. Within the Account tab, click ADD and enter the details below:
• Account Name: This can be whatever you want as it is only used in context of this TA.
• Username: Client ID from the API client generated above.
• Password: Secret from the API client generated above.

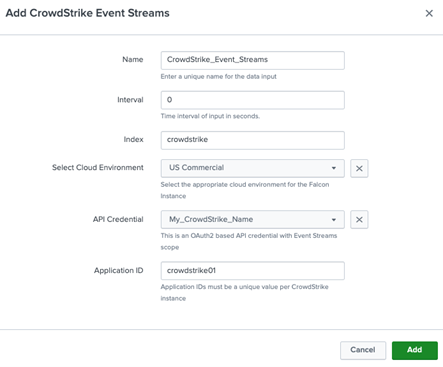
Next, go to INPUTS on the top of the page and select CREATE NEW INPUT. Enter the required information as seen below. Note that the API Credential dropdown will now have your CrowdStrike account created in the last step:
Once saved, you will see your new input has been created. It may take several minutes for events to start coming into your CrowdStrike index (i.e., index=crowdstrike). The CrowdStrike Falcon app will also start populating as data comes in. The home view defaults to the last 24 hours, so you may need to expand your time range to make the dashboard populate.

If you have additional questions regarding configuration of the CrowdStrike app or onboarding of data, reach out to our team here at TekStream.
We look forward to hearing from you!