

Splunk KvStore Migration
By: Christopher Winarski | Splunk Consultant and
Bruce Johnson | Director, Enterprise Security
Migrating your Splunk environment can be a daunting task to some. With the worry of missing valuable data. Did my users’ settings migrate properly? Did all my applications migrate properly? Did all my lookup tables survive the migration? If you find yourself performing a Splunk migration you may be asking yourself some of these questions. Well, today I try to take one of those worries off your chest by walking you through a Splunk KvStore Migration, more specifically migrating the Splunk KvStore from a Search Head Cluster to a new Search Head Cluster. E.g On-prem Shcluster to AWS Shcluster
KvStore stores data in key-value pairs known as Collections. These tables of data are located in your collections.conf files. Records contain each entry of your data, similar to a row in a database table. Using KvStore as opposed to csv files you can define the storage definition schema for your data, perform create-read-update-delete operations on individual records using Splunk REST API and lookups using the Splunk search language. KvStore excels in performance when you start getting large lookups with many data points which is especially prevalent within Enterprise Security, one of Splunk’s Premium Apps.
The normal export/migration is to use csv export which is not really practical for large KvStores due to the limitations to file sizes on most operating system’s is what drive was used for mongodb in the first place. Gemini KvStore Tools helps to circumvent the normal semi-workable, tedious migration process.
Gemini KV Store Tools comes with some custom commands built for the Splunk search bar that makes our life/migration less complicated. The commands we are interested in for this migration are:
- | Kvstorebackup
- | Kvstorerestore
Requirements for this process:
- You must already be utilizing Splunk’s KvStore for your lookups.
- Downloaded and installed “Gemini KV Store Tools” application in both the originating environment Search Head Cluster and the new environment Search Head Cluster you are migrating too. https://splunkbase.splunk.com/app/3536/
- You must have already migrated/copied the applications from the old Search Head Cluster. We are interested in the collections.conf within these applications.
- tar -zcf apps.tgz /opt/splunk/etc/shcluster/apps
- The collections.conf files must be present on the new environment before proceeding
Step 1: Of the original Search Head Cluster, Identify the kvstore captain, and log into the GUI environment, then open the search app. The KvStore captain is the instance in the search head cluster that receives the write operations regarding the KvStore collections where the Search head captain is the instance in the search head cluster that schedules jobs, pushes knowledge bundles to search peers, and replicates any runtime changes to knowledge objects throughout the search head cluster.**note** This may be different than the Search Head captain
Step 2: On this instance, also log into the backend and create a directory under the /tmp directory named “kvstore_backup”. Ensure Splunk has read/write permissions to this folder.
cd /tmp
mkdir kvstore_backup
sudo chown -R splunk:splunk /tmp/kvstore_backup
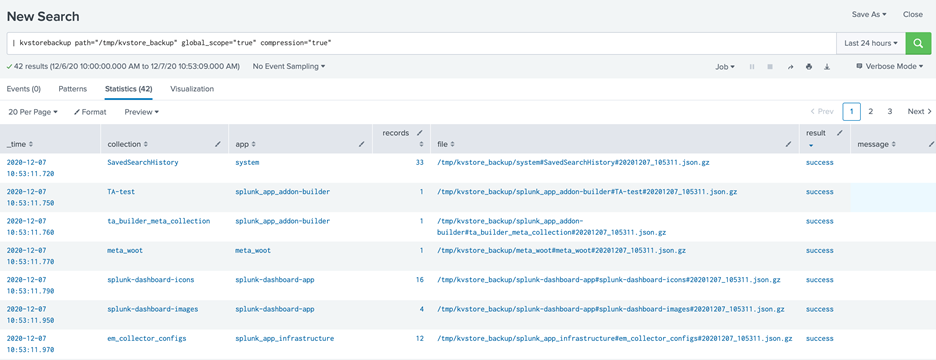
Step 3: Creates a json file per each collection to the destination path in the kvstore_backup folder, as well as should see “Success” per each collection zipped within the original environment. In the search bar on original environment KvStore captain, run:
| kvstorebackup path=”/tmp/kvstore_backup” global_scope=”true” compression=”true”
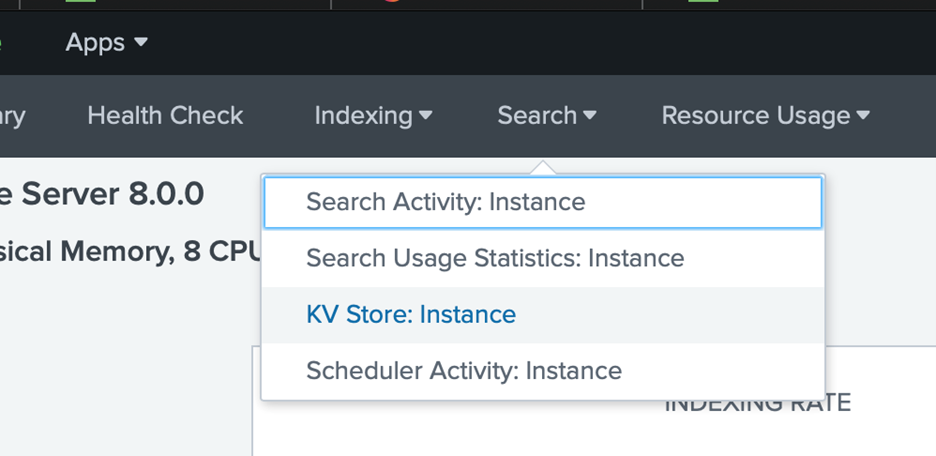
Step 4: Check KvStore monitoring console to verify if collection counts are listed and save the page to refer to the results/counts to verify later. (old environment)
Monitoring Console > Search > KvStore:Instance
Step 5: Now that you have created your collection backups and have verified that the number of records per is correct. Go on each new search head cluster member (CLI) and edit server.conf to have:
[kvstore]
oplogSize = 10000
Also, on each instance, you have to edit/change the search head replication factor to 1 in the new environment on each search head cluster member. (server.conf)
[shclustering]
replication_factor = 1
Once both are set, restart the instance. Do this for every search head cluster member in the new environment.
Step 6: Identify and get Search Head captain to be the same instance as the kvstore captain.
Ensure the kvstore captain = Search Head Cluster captain.
Useful commands:
./splunk show shcluster-status
./splunk show kvstore-status
Transfer captaincy to one node by bootstrapping the kvstore captain as the search head captain.
On the KvStore captain, we want to make it also the search head captain, run this command (CLI):
./splunk edit shcluster-config -mode captain -captain_uri <URI>:<management_port> -election false
On each other non-captain instance, run this command (CLI):
./splunk edit shcluster-config -mode member -captain_uri <URI>:<management_port> -election false
This will allow you to specify the captain as the kvstore captain and get rid of dynamic captaincy for this purpose. At the end we will want to revert our search head cluster back to a dynamic captaincy.
Step 7: Once you have the kvstore captain = search head captain, Log into the CLI of the other search head nodes (every search head cluster member that is not the captain/kvstore captain). Starting the instance after cleaning the local kvstore will initialize a kvstore synchronization upon startup with kvstore captain.
SHUTDOWN Splunk: ./splunk stop
run: ./splunk clean kvstore –local
Then start splunk: ./splunk start
Step 8: SCP kvstore_backup from Step:2 to new environment search head captain/kvstore captain. Make sure that splunk has permissions to access the file. Follow these steps for guidance.
Old instance where the backup was created from:
scp -r kvstore_backup ec2-user@IPADDRESS:/tmp
Move file to /opt folder on kvstore/search head captain:
mv kvstore_backup /opt/kvstore_backup
Change ownership of the file and internal files to splunk for permissions
sudo chown -R splunk:splunk /opt/kvstore_backup
Step 9: Kvstore Gemini Tools is to be installed on the new search head cluster prior to running this step, if you have not done so please insure it is installed within the new search head cluster. Once the kvstore_backup has the permissions and is in place on the backend of the kvstore captain/search head captain. Now log on to the GUI of that splunk instance, open search and run:
| kvstorerestore filename=”/opt/kvstore_backup/*.json.gz”
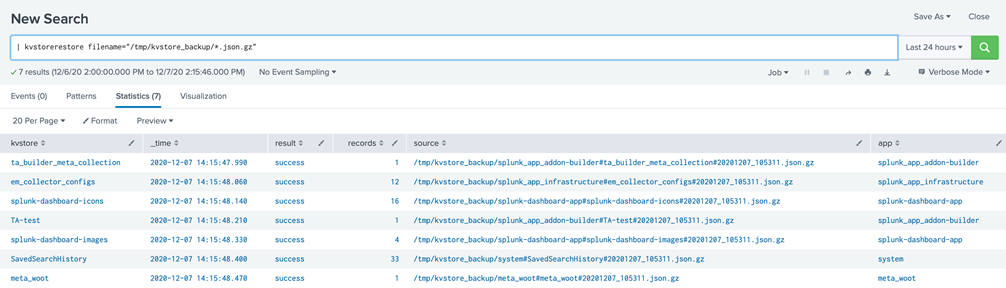
On big restores, can take many minutes for the restore to complete, be patient and let the search run.
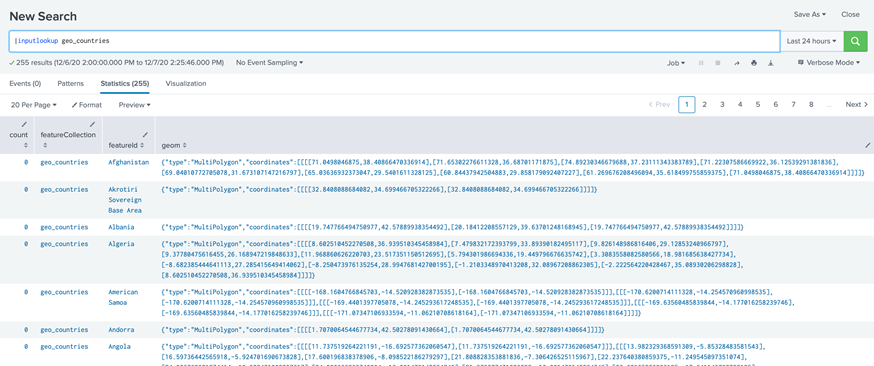
Step 10: Verify lookups return the same results in the new environment as back in the old environment with the saved page(step 4) , run:
| inputlookup <Lookup definition>
Step 11: We want to revert the search head cluster back to a dynamic captaincy now (the static captaincy bootstrapping was just used for the migration) and also change our replication factor back to the original setting in the environment.
You can do this by logging on to each instance CLI, stopping splunk then on the search head cluster captain, run:
./splunk edit shcluster-config -mode captain -captain_uri <URI>:<management_port> -election true
On the other non captain search head cluster members run:
./splunk edit shcluster-config -mode member -captain_uri <URI>:<management_port> -election true
Then we want to edit the config file again to revert replication factor back to the original number that was set before the migration. (server.conf)
[shclustering]
replication_factor = 2
**The “2” is arbitrary here, as this should be set to the number that was present prior to the migration**
That’s it! Migrations can be a scary endeavor and if not prepared, one can easily lose data. If you seek further assistance don’t hesitate to reach out to us here at TekStream Solutions. We would be happy to help! No Splunk project is too small or too big.